Posts

Showing posts from October, 2015

Editing Workshop 4

Image
Today was our final editing workshop where we went over some of the things we had learnt in the previous workshops and were taught how to fix an audio clip with background noise in Audition CC 2015. We learnt how to create a title page and insert it into a sequence. this is helpful for when I need to create a title or end credits for my productions. We were also taught how to remove background noise from an audio clip. After opening the clip in Adobe Audition, we selected a small section of the noise we wanted to remove, used noise reduction and then changed some setting until it sounded the way we wanted it. We practiced colour correction with certain clips from Fairly Legal, some had a slight blue tone where others were more orange and the colours had a much higher saturation. By using the three-way colour correct, we changed the settings to match up the colours as much as possible.  The ripple delete tool can be used to cut down or lengthen a clip, it ...

Storyboards

Image
On Monday, we looked at story boarding and how it is done. 'They are a series of sketches, used as a planning tool to visualise the action on a story unfolds.' They are used in the production stage of a film/TV show as a guide to setting up the shots, however not all TV shows and films use them. They focus on the key shots that make up the scene or sequence. Programmes such as Eastenders will use a shot list instead of a storyboard as their story is quite easy to follow. They are done in black and white and can be in lots of detail or stick men. I have started to storyboard my own script, choosing the most important shots to include.       

Editing Workshop 3

In our third editing workshop, we were looking at audio and how to use one audience track so that the sound stays the same, but syncing it up with different clips. The clips we were given were quite dialogue heavy which would have made it difficult to cut up the audio, so by making a 'radio edit' and getting the audio to work first it made it easy to just match up the different shots over the top of the dialogue.   We learnt that when editing a video with dialogue,  making the dialogue start and then cutting to a shot of the person talking makes it seem more natural and demphasises the cuts. This is achieved by using the ripple delete tool to make the clips start after the dialogue and flow nicely.

Camera Workshop 3

In our third camera workshop, we spent the time testing out the audio options on the camera. We filmed inside using a Rode microphone attached to the camera, we experimented with the audio making the subject move forwards and backwards looking at how it affects the sound depending on the distance between them and the camera.  This workshop was helpful because we learnt how to adjust the settings on the camera to suit the location. We also went outside and filmed some clips to see how different locations can effect your audio quality and how you have to adapt microphone for example putting the wind shield on to break up the frequencies. When I film my project, I will need to make sure that I use the correct settings as I am filming outside soother will be much more background noise which I will need to look out for. 

Camera Workshop 4

Image
In today's camera workshop, we were learning about the 180 degree rule. This means when filming a scene in different shots the camera cannot cross the line from the subjects otherwise, if you are filming two people having a conversation they will look like they are facing the same way and not looking at each other. This was useful in that it is something that I will need to remember when directing my project. If I was to do this project again, I would use different shots and be more creative with them.  

Soft Trailer

Image
Using the short film Soft by Simon Ellis, Sammi and I created a trailer for the film. We chose to fade specific clips together in order to make them flow nicely, between clips of the main character walking and a a fast paced sections of people running and some action happening because we wanted these sections to be more jumpy and create more tense atmosphere.    We decided to put two clips next to each other and play in sync, emphasising the 'father and son' idea and how they are put in similar situations but deal with it very different ways. I found this task helping in that I learnt to chose the post important parts to include in the trailer which is something I will consider when story boarding my 2-minute section of my script.   

Alone - Short Film Review

Image
Alone. Alone is what this man is. Years after the world ended and the human race perished; this is the only man left standing. How did he survive? What caused the outbreak? We don't know. No one does. This short film gives you an inside look on what the only man left alive does on a day-to-day basis, what he does to survive, kill time, and keep himself sane. Alone, directed by Brock Torunski is a 6 minute short film about a man who is the only one left on the planet. I found that this short film uses lots of exposition which is not really needed as an audience can tell by the conventions used such as a deserted location and  a slight blue tint which gives the film a cold atmosphere some of what is going on in the film.  The film is a long a descriptive monologue which leaves nothing for the audience to imagine. I think that this closes the film of to a wide audience because not everyone will be able to relate to is, if there is some room for the audie...

Writing a Script

Image
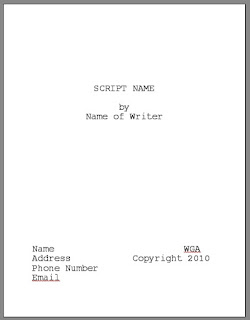
*A screenplay only tells us what we can see and hear*  Important things to consider are  Title page - which should contain the name of the story, the writers name, draft date and contact details which are important if you are handing out your script to people. Scene headings - the scene heading should state whether it is to take place inside or outside using INT. or EXT. It should also contain the location, e.g. BEDROOM, HOUSE and time of day - DAY/NIGHT Action -  The action under the scene heading should contain enough detail so that the reader can picture the location or action but concise enough that it is just a long paragraph of description, it should also be written in the present tense.  Characters - when introducing a new character, their name should be written in capital letters so that the reader knows they are a new characters. If the character is not in the scene but can be heart or are a voice over, then (V/O) or (O/S) should be...

Editing Workshop 1

In our first editing workshop, we learnt how to use Adobe Premiere Pro. Firstly, we were taught how to set up our computers in order to use premiere pro effectively, for example changing some of the settings on the mac so that we can use all the shortcuts that make premiere much easier to use. Although I have previously used premiere pro, I found this workshop very useful as I learnt some useful tips and easy ways to access and cut my videos down to the sections I want. Our task was to edit together some clips we were given in order to create a sequence that match an audio recording we were also provided with. I enjoyed this task as I very much like the more technical side of film and television. Specifically, I enjoyed cutting the clips and piecing them together to make a story, creating a more dramatic effect by using some music in the background.

Screenwriting Research

Image
MADELINE DIMAGGIO'S HOW TO WRITE FOR TELEVISION Reading this book was really helpful for me at the beginning of writing my script. It provides lots of information for someone starting in script writing . One sections talks about establishing your location and making sure that your description is a 'visual backdrop' and gives a good picture of the location. The book also mentions that the scriptwriter creates the location and a director decides how to shoot it, choosing the camera angles and movements. DiMaggio writes about characters and how it's important to have intense and developed characters as they take you through the script. Once you have your structure, the characters should take you the rest of the way through; which not only opens up the story visually but develops other aspects of the script. I think this is important as characters need to develop and change in order to keep an audience interested in the story.   SYD FIELD - SCRE...

25 Word Pitch (Developed)

Image
 Pitch: Two detectives are launched into a major investigation that tests their relationship and reveals unwanted truths they've been hiding. Could this be the end of their career? Plot: The two main characters are sitting in a car (or walking down the street towards the crime scene). They pend a minute talking - establishing their characters. Out of work the characters are good friends with each other and regularly do things together. Both characters are nervous as this case is one of the biggest they've ever worked on and possibly the one that will expose them. When they arrive at the crime scene, Annie starts asking questions and talking to other characters at the scene while Steph stands back, watching too scared to say anything. They discuss the crime and talk to different people about the different bits of evidence, e.g. murder weapon, victim, killer profile. Steph still reserved and not giving much input starts to look uneasy and people begin to no...

Camera Workshop 2

Image
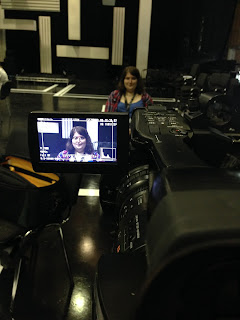
In our second camera workshop, we were given the task of creating a sequence of shots that fit together showing someone walking towards and sitting down on a chair.  We looked at how to make make sure that our subject was completely in focus - for this we zoomed in as far as the camera will go on the subject and then set the focus, we also learnt about using the expanded focus setting on the camera which zooms in further to get an even sharper focus. When focusing, we used the 'Peaking' button on the camera which allows you to see exactly where the camera is focused by flashing red on the sections. We practiced changing the exposure and white balance to make sure that the colours on the camera were the same as in real life, experimenting with changing the colour temperature depending on the lighting situation on location.     We also learnt about the 'Zebra' setting on the camera. This shows the camera operator where the lighting is too strong on the subje...